
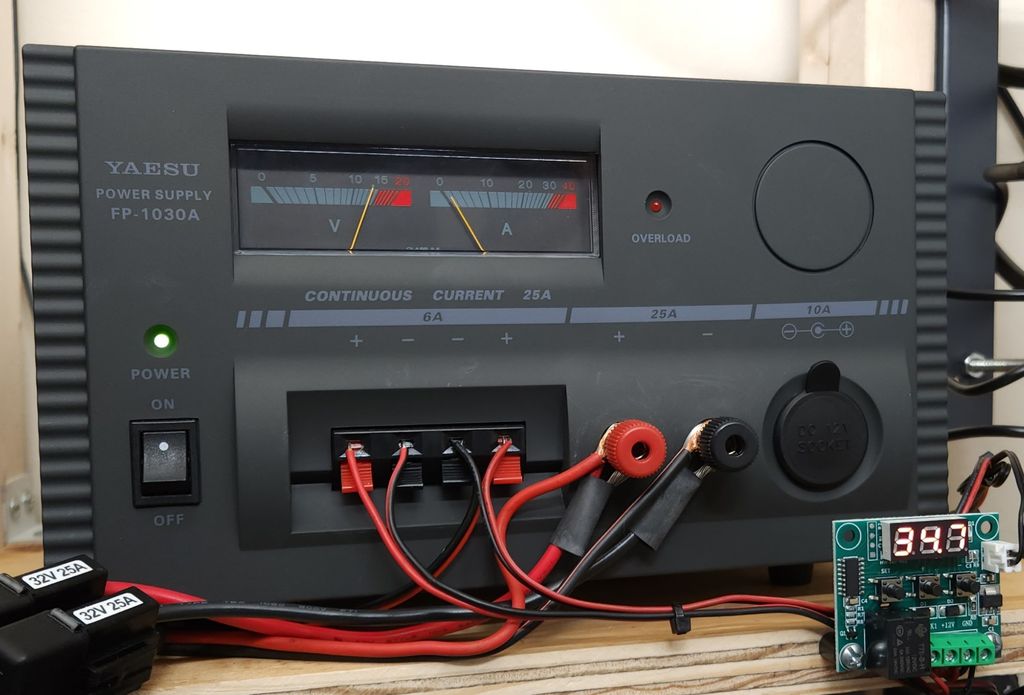
The Yaesu FP-1030A is a great power supply. 5-stars!
This is Not Rocket Science
I never said everything I post here is going to knock your socks off. This little blurb certainly will not do that.
However, when I find something that is pretty easy to do and makes my life better, I always think, "I need to share that. Someone else could get an idea from it. It might help."
So here we go again.
My ham radio gear is in the same room where I work five days a week. I kinda like that. I can monitor a few frequencies while I manipulate the disgusting bowels of AutoCAD hour after hour.
The room is pretty quiet. I spent some effort to keep the computers quiet (there are four) by use of rubber dampers and specific fans.
When I added the FP-1030A power supply to the room, it was noticeably noisy. Irritatingly so. I tried to learn to tune it out, but it would not be ignored.
So I ordered a replacement fan for the one inside the power supply. It's this one:

BTW: I get nothing from Amazon unless I pay for it.
When I received the new fan, I pulled the original fan out of the power supply and compared the air-flow of the two. It was not at all surprising that the new fan seemed to put out about two-thirds as much flow as the original fan.
Installation was pretty straight-forward. I used JST-XH crimp-on connectors (solder/shrink on the male) to connect the new fan to the existing power leads. Mounting the fan using the original screws was a piece of cake.
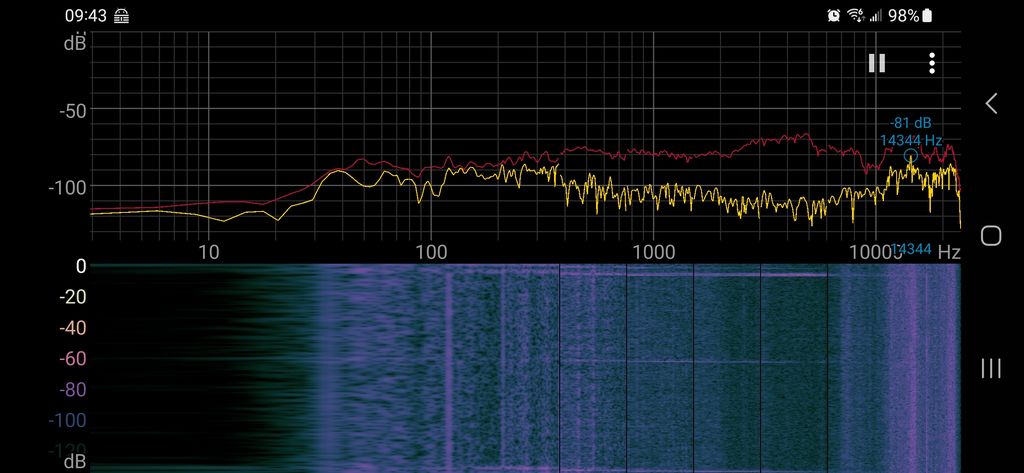
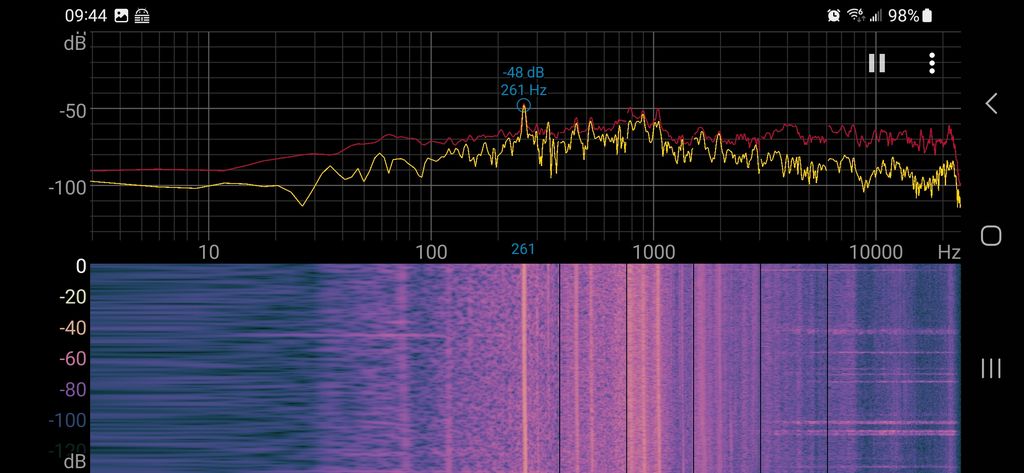
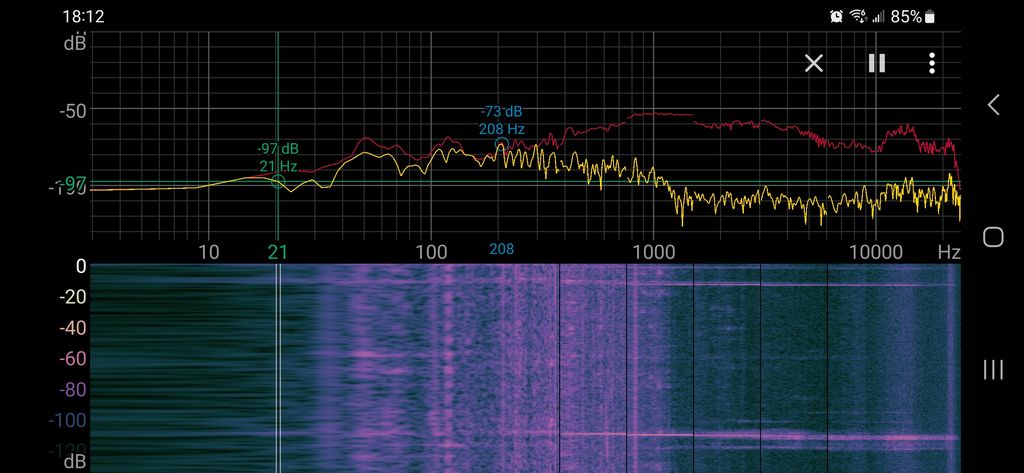
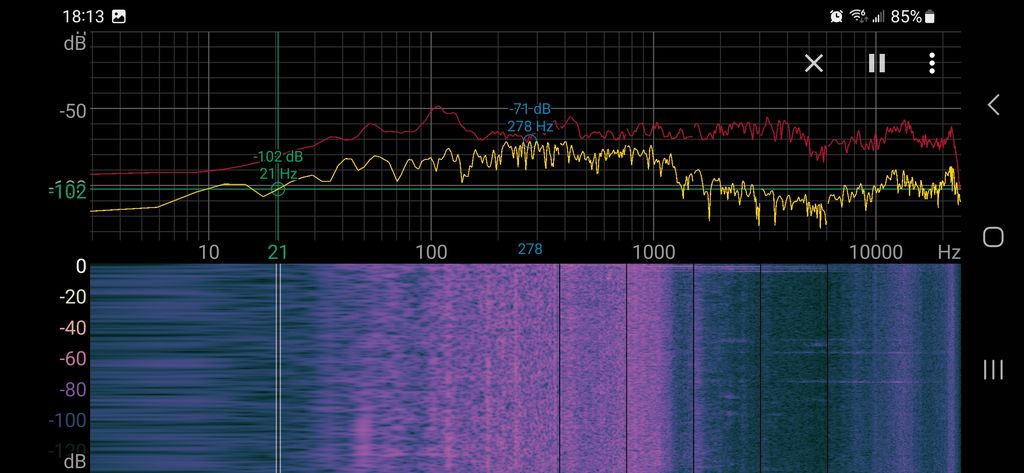
In the gallery below you can see how much difference the new fan makes. The old fan went from -81dB ambient to -48dB when I turned it on. The new fan goes from -73dB ambient to -71dB with the fan running. (NOTE: the difference in ambient noise readings is simply because it was two different days.) The new fan is WAY quieter.
However. (There always seems to be one of those, doesn't there?)
. . . I couldn't get over the fear that I might push the supply too hard one day and burn something out because it wasn't cooled properly.
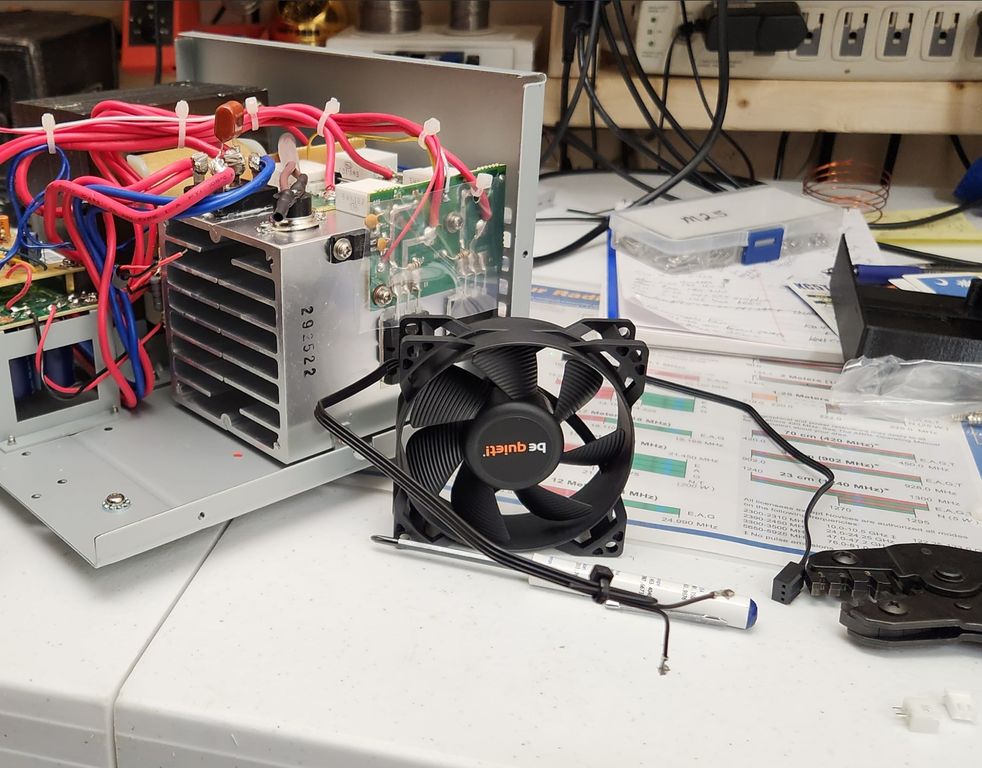
** SO:** I decided to use the original fan as an auxillary fan and to put it on a thermostatically controlled relay. I ordered this guy from (you guessed it) Amazon: HiLetgo 2pcs W1209 Temperature Controller Board
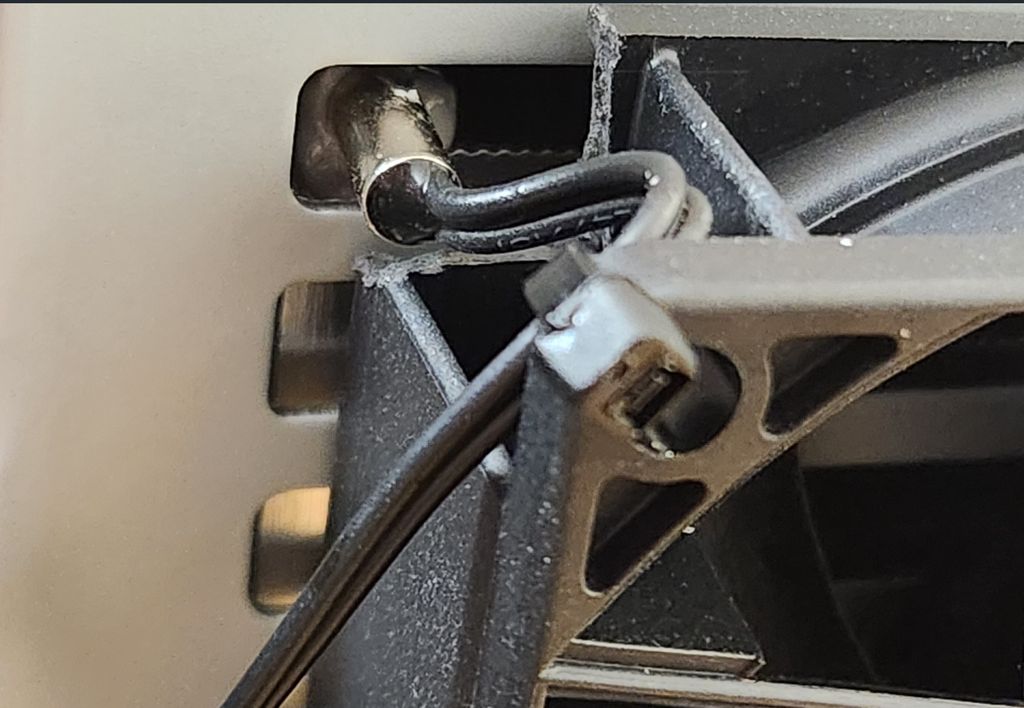
I measured the temp probe diameter with a caliper, selected the proper size drill bit, located a good spot for a hole in the heatsink, center-punched it, drilled a pilot hole with a tiny bit, then drilled out the socket for the temp probe.
I coated the probe with CPU thermal paste and shoved it in the socket. Perfect!
The location of the probe socket required notching out one of the mount screw holes in the fan. No problem, we have three more.
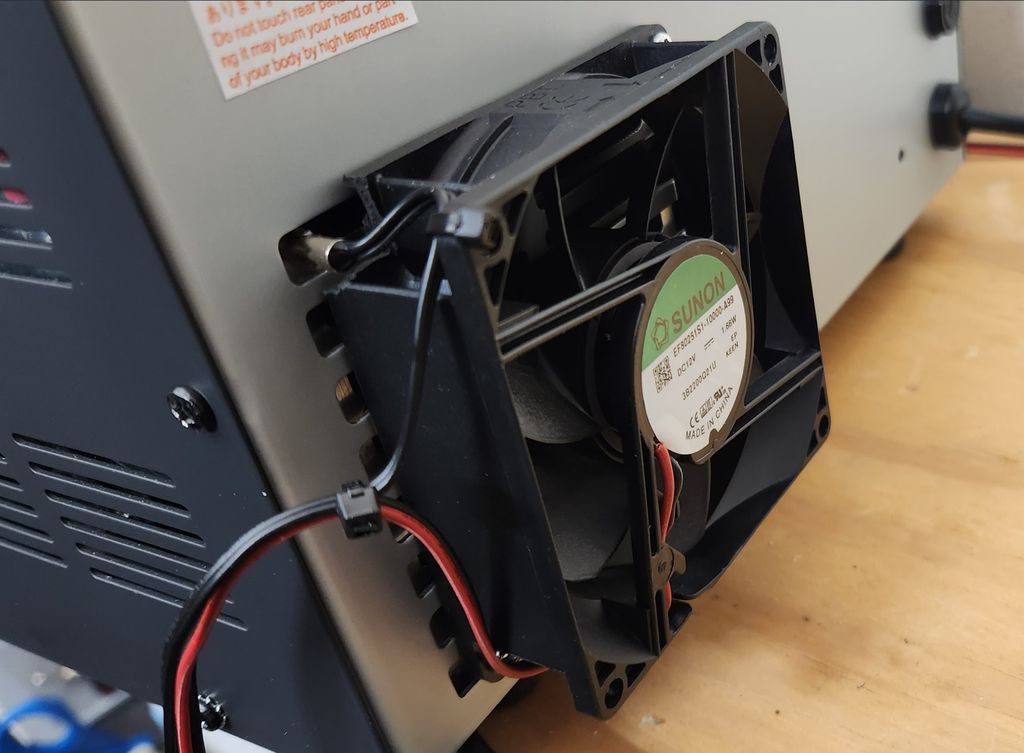
I soldered longer leads on the fan and mounted it to the rear of the power supply. This was made easy because the manufacturer had slotted the rear of the power supply case in such a way that the fan mount holes in the aluminum extrusion that is the heatsink were perfectly exposed.
I set the little controller to turn on the fan at 60°C and wired it up.
A Fan-tastic Gallery!:

This arrangement works fantastic! Most of the time the power supply is silent. But if I do a lot of transmitting at higher power levels (over 50W), after a while the aux fan will come on to bring the temp back down.
I get my quiet, and when it really needs it the power supply gets its cooling. Now that's a Thing That Works.
